Observe that I prefer to use Japanese W&T (can be found in a
previous post as Japanese short rows).
There are at least two ways of working intarsia in the round… but my
favorite is this one where you work the different colours in their own
sections:
On RS: K until 1 st to EOR and PUW. W&T and cont to P. – My PUW on
RS is ssk, where 1st slipped st is the last st of the round and the
2nd slipped st is the wrap st from the previous round.
On WS: P until 1 st to EOR and PUW. W&T and cont to K. – My PUW on
WS is P2tog.
Back in 2013 I got an idea that challenged me to learn a new knitting
technique: intarsia. The blog post about it is here. – And I fell in love with
the technique and all the possibilities it gave me for designing.
Since that first project I’ve made few intarsia designs that I’m still pretty
proud of: my all time favorite “Still Panda” that combines Veera Välimäkis
pattern Still Light and my own motif from Panda.
Another one that I’m still very proud of is “Pikselimössö” (that is
still on the draft board…). My craziest idea so far and you can see on my
Ravelry project page why it still is a crazy idea with all the bobbins :D
But who knows how many more crazy intarsia ideas I still get with a
quite an easy technique at the end of the day. Check this video and see for
yourself that intarsia isn’t that hard:
On RS: K until colour change; cross the two yarns in the back of work (WS
of work) and cont to K with new colour.
On WS: P until colour change; cross the two yarns in front of work (WS
of work) and cont to P with new colour.
I’ve only recently discovered and felled in love with the Japanese way
of making short rows. There’s not any big different to the more common W&T,
where you wrap yarn around the next stitch. But for my loose knitting the
Japanese style makes a neater outcome: instead of wrapping yarn around the next
stitch, you’ll wrap the yarn around the needle.
Japanese short rows on RS
On RS of your work you’ll K to the turning point, turn work, wrap the
yarn around RH needle and cont to P. – When working wrapped sts tog you’ll
K2tog with the st on the left side of the wrapped st.
Japanese short rows on WS
On WS of your work you’ll P to the turning point, turn work and wrap the
yarn around RH needle and cont to K. – When working wrapped sts tog you’ll make
a ssp with the st on the left side of the wrapped st.
I’ve figured out that this style works with my loose knitting ‘cause it
keeps my yarn tension constant.
I’ve been a long time fan for twisted rib. I prefer it simply because it
gives a nice and stretchy, yet a firm edge for knits. And in my opinion a
twisted rib recovers best its original shape after stretching.
Twisted rib with K1tbl, P1tbl sts:
Twisted rib in a yarn with a tight spin might not feel as nice against
your skin as in a yarn with a looser spin. To avoid this kind of uncomfortable
detail I usually knit twisted rib for sock and sleeve cuffs, that comes tight
against your sensitive skin, with a “twist”: on RS rep *K1tbl, P1* and on WS
rep *K1, P1tbl*:
This way stitches on WS are a bit softer and smoother against the skin.
There is at least few ways of making one stitch when adding stitches in
a knit (like knitting in the stitch below and knitting a stitch from front and
back etc.), but my favorites are:
M1R (make one right)
Pick up yarn from behind between sts to left hand needle and K through
front loop. This makes a right leaning stitch.
M1L (make one left)
Pick up yarn from front between sts to left hand needle and K through
back loop. This makes a left leaning stitch.
I like the look of these techniques; how the stitches smoothly blend to
the knitted surface and how they are easily spotted if you’re in need of
counting the added stitches for example. These leaning stitches also gives you
a chance to play with the structure of the stitches:
In this picture above I’ve worked “K until SM, M1L, sm, K to EOR” and in
the picture below I’ve worked “K until SM, sm, M1L and K to EOR”.
My favorite is definitely the latter one. In my eyes it’s a teeny tiny
bit of neater outcome.
I’ve been testing all kinds of knitting techniques
during the years. And I love to test new ones in search of the perfect ones for
me and my designs. Though I have already found some of my absolute favorites…
that I will share with you in some upcoming blog posts.
The first technique I’m sharing with you is my
favorite when casting on toe up socks:
Figure 8 Cast On
The CO is made with circular needles holding
them parallel and wrapping the yarn in figure 8 around the needles. Leaving a
short tail of the yarn wrap it around the upper needle and work the yarn
alternately around and between the needles. Continue wrapping a figure 8 around
the needles until you have the desired number of sts, ending with a bottom
loop. You’ll now have an equal number of sts on both needles. The CO is ready
only after working once the sts on the 2nd needle: rotate the needles so you’re
holding them with your left hand and pull the bottom needle through the sts so
that they’re on the cable. With the right hand needle K the first st of left hand
needle and K the following sts tbl. Now the CO is ready.
My favorite
BO has been for quite some time already Tubular BO. Definitely my “go to” when
working with 1 x 1 ribbing. I favor it because it makes a firm, yet a really
stretchy edge.
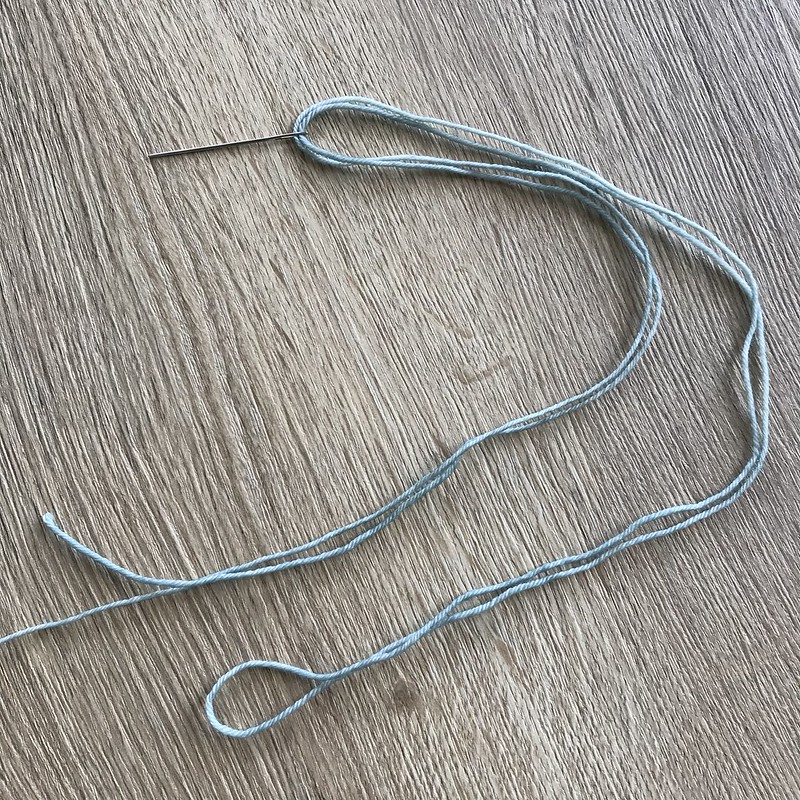
For making
a Tubular BO I reserve a yarn tail that is at least 2.5 times the length of the
stretched edge. Usually I reserve 3 times the length to be absolutely sure I
have enough yarn for the BO.
Because the
yarn tail is long and gets easily tangled, I thread it in double through the
needle. Now the tail is a bit easier to manage.
I always
start the Tubular BO on the RS of the work and with a K st. The first two sts
are set-up sts before starting with the actual BO repeat: thread the darning
needle through the first K st from back to front, bring then the needle between
K and P sts from back to front and then thread the needle through the first P
st from front to back.
Now the
first two sts are ready for the Tubular BO repeat:
1. Thread
the needle through first K st from front to back and sl st of the needle. Pass
by P st and cont to thread the needle on RS through the second K st from back
to front. Tighten the yarn.
2. Tread the
needle through first P st from back to front and sl st from the needle. Pass by
K st and cont to thread the needle from BS between K and P st to the front and
then through the second P st from front to back. Tighten the yarn.
It takes a
while to learn this BO, but I’ve gotten help from a simple “mantra”: thread K sts
from front to back and again from back to front, and thread P sts from back to
front and again from front to back.
To make a
neat ending for in the round ribbing, BO the last two sts as follows: thread
the needle through the last K st on the needle from front to back and sl st of
the needle. Pass by the last P st and thread the needle on RS through the next
K st (the first K st where the whole BO rnd started) from back to front. Thread
the needle through the last P st on the needle from back to front and sl st
from the needle. Pass by previous K st and thread needle through the next P st
(the first P sts where the whole BO rnd started) from front to back.
Weave in
end on WS of the work.
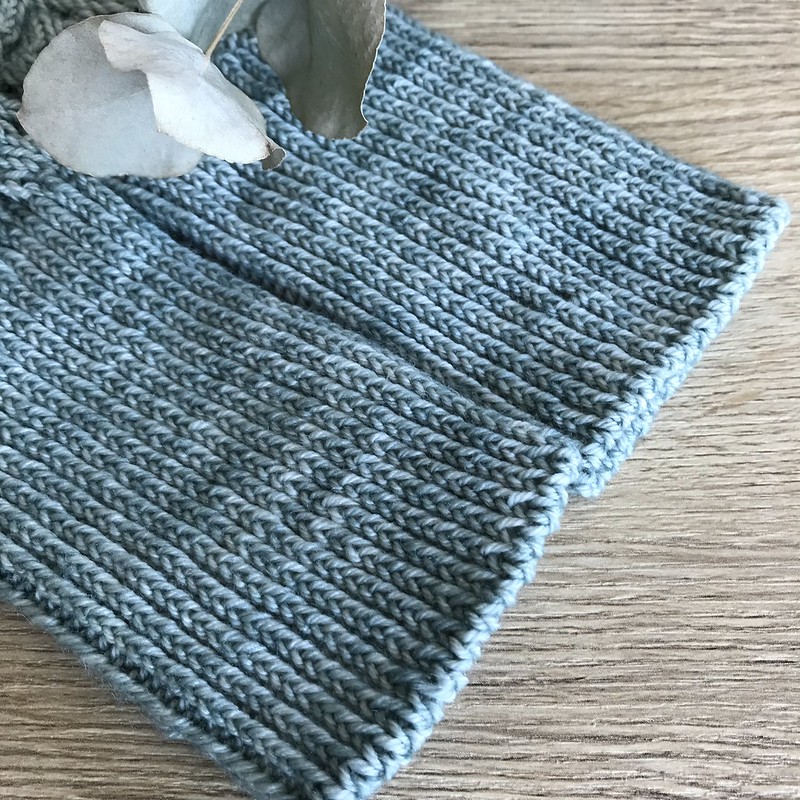
The ribbing
edge is now really stretchy, yet firm and looks neat: