Näytetään tekstit, joissa on tunniste knitting. Näytä kaikki tekstit

28. helmikuuta 2021

Kaaso nro 1

I’ve never considered myself as a sock knitter… but lately my collaborations have been all about socks. How did this happen?

Well my resent collaboration started actually quite some time ago; in the spring of 2019. (Right after the release of my Viisukat pattern.) My colleague was getting married and I got the honor of designing socks for her Maids of Honor.

I made some mood boards from where she picked the one that was most to her liking. And it was the one that I had imagined in my head to be some lace socks. (I can’t find the mood boards anywhere, so they might be somewhere in my previous lap top that gave up just after releasing Viisukat.)

Our next stop was a yarn shop: Ilo Finlad. There my colleague picked up the colours I would be using: soft pink, soft gray and white. Not the colours I would have choose… so it was a challenge for me to get in a romantic designing mood and come up with a pattern for soft pastel colours that would also include some lace.

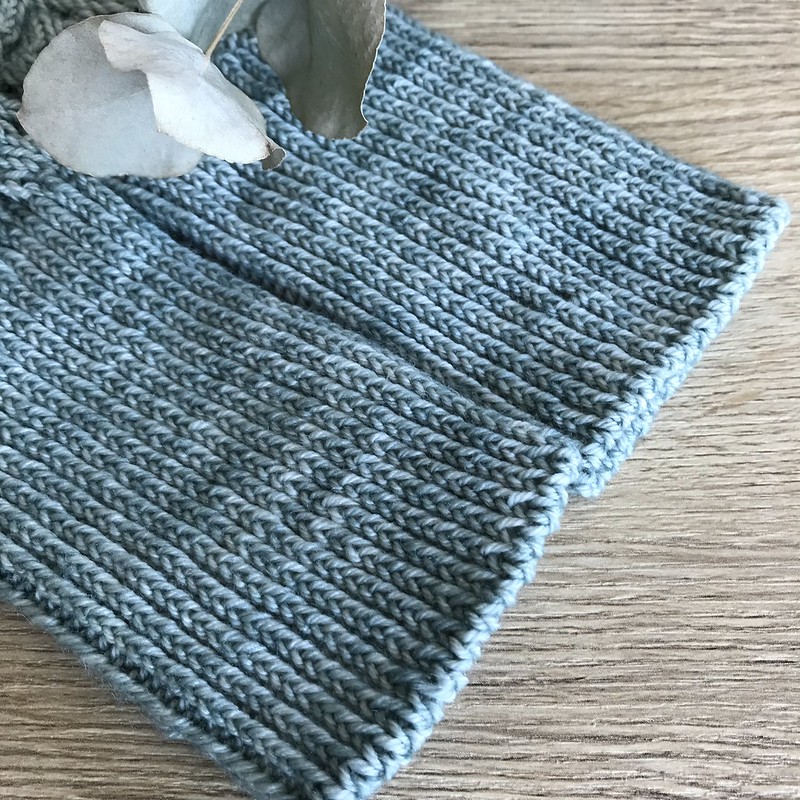
The first pair got the name Kaaso nro 1 – Maid of Honor No 1:


When Sukka-Finlandia announced that they were looking for sock patterns for the contest of 2021, I knew I wanted to submit Kaaso nro 1.

That meant I had to finally write up the pattern! This time I also 
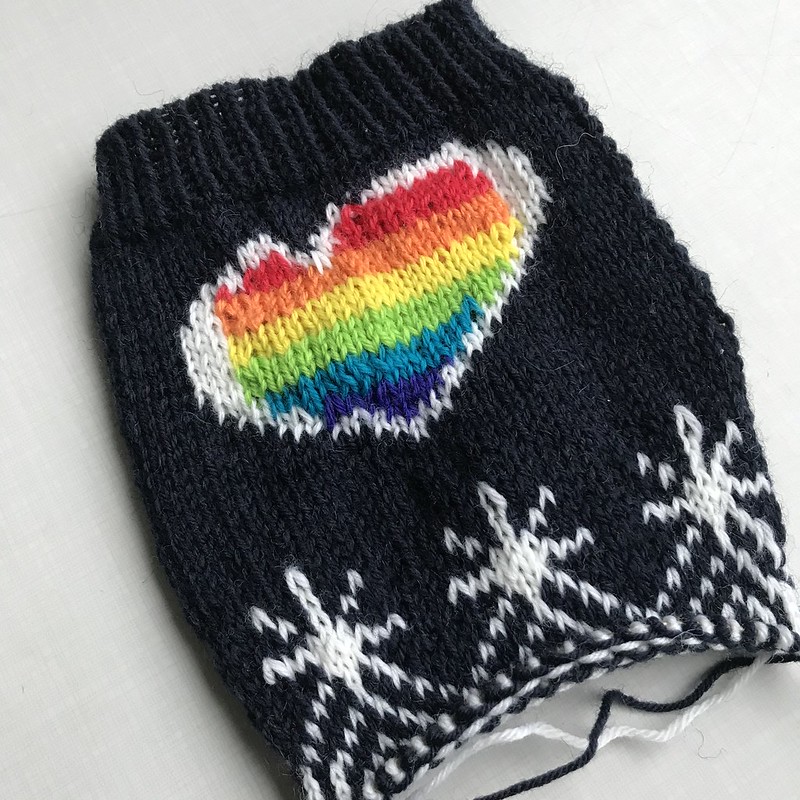
navigated to Ilo Finland and got the most lovely Aara Yarn Mieli for my socks. Since the design was originally something romantic, I wanted to use coulours as close as possible to the original pair. So the colours that I chose were Kriikuna as main colour, Helmi as contrasting coulour no 1 and Luja as contrasting colour no 2. – It should be noted that for the contrasting colours the smaller mini skeins are enough.

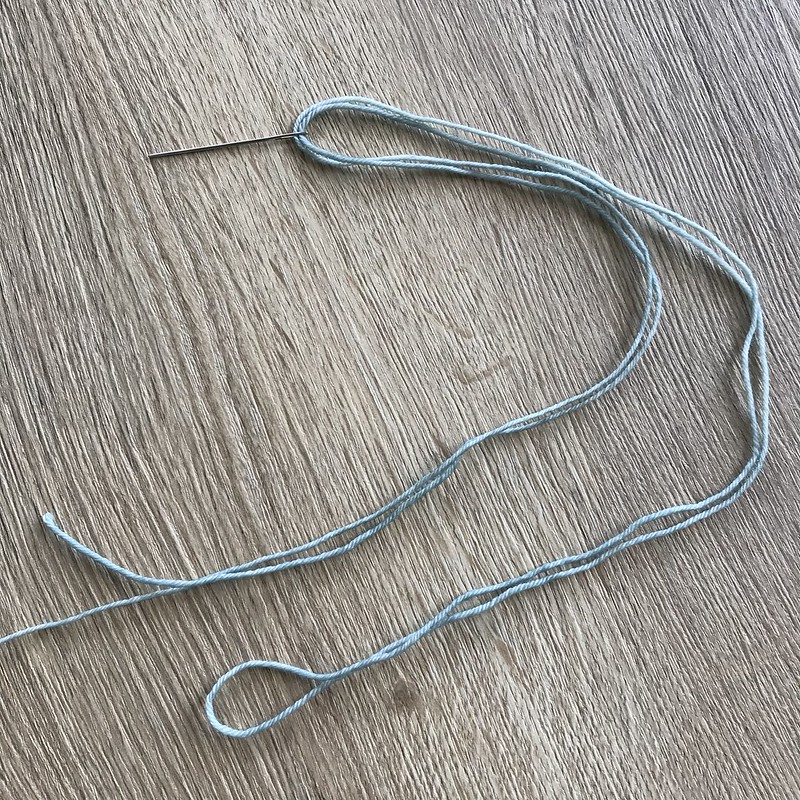
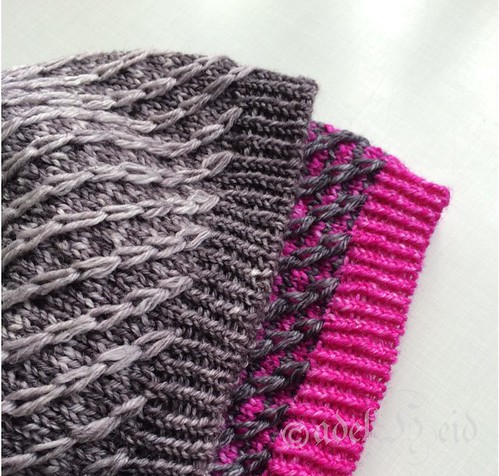
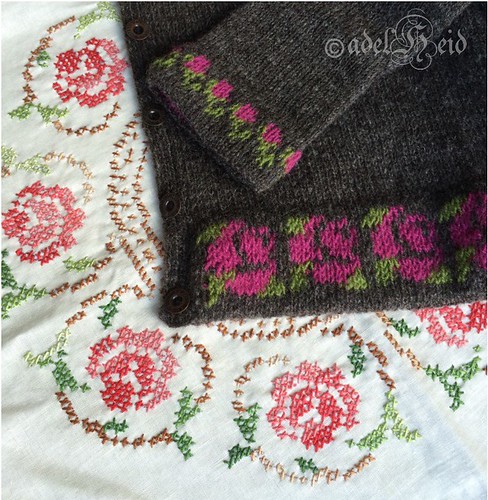
The socks are knitted toe up using Magic loop and the pattern includes these special techniques: figure 8 CO, intarsia, intarsia in the round, Tubular BO as well as some embroidery. So this is definitely an advanced pattern.

This new pair of Kaaso nro 1 sock in the luxurious hand dyed Aara Yarn Mieli is my favorite so far:


But you have to check out all the different and interesting colour combinations that the contestants of Sukka-Finlandia 2021 have come up with! They can be found here on Ravelry and on Instagram with #KaasoNro1 – I’ve also collected a gallery of the contestants socks to my Instagram account and it can be found right under my bio.


Sukka-Finlandia has so far exclusive right for the pattern, but I’m planning to release it later also in English.

20. helmikuuta 2021

My favorite techniques: Intarsia

Back in 2013 I got an idea that challenged me to learn a new knitting technique: intarsia. The blog post about it is here. – And I fell in love with the technique and all the possibilities it gave me for designing.

Since that first project I’ve made few intarsia designs that I’m still pretty proud of: my all time favorite “Still Panda” that combines Veera Välimäkis pattern Still Light and my own motif from Panda.

Another one that I’m still very proud of is “Pikselimössö” (that is still on the draft board…). My craziest idea so far and you can see on my Ravelry project page why it still is a crazy idea with all the bobbins :D

But who knows how many more crazy intarsia ideas I still get with a quite an easy technique at the end of the day. Check this video and see for yourself that intarsia isn’t that hard:


On RS: K until colour change; cross the two yarns in the back of work (WS of work) and cont to K with new colour.

On WS: P until colour change; cross the two yarns in front of work (WS of work) and cont to P with new colour.

19. helmikuuta 2021

My favorite techniques: Japanese short rows

I’ve only recently discovered and felled in love with the Japanese way of making short rows. There’s not any big different to the more common W&T, where you wrap yarn around the next stitch. But for my loose knitting the Japanese style makes a neater outcome: instead of wrapping yarn around the next stitch, you’ll wrap the yarn around the needle.

Japanese short rows on RS

On RS of your work you’ll K to the turning point, turn work, wrap the yarn around RH needle and cont to P. – When working wrapped sts tog you’ll K2tog with the st on the left side of the wrapped st.

Japanese short rows on WS

On WS of your work you’ll P to the turning point, turn work and wrap the yarn around RH needle and cont to K. – When working wrapped sts tog you’ll make a ssp with the st on the left side of the wrapped st.

I’ve figured out that this style works with my loose knitting ‘cause it keeps my yarn tension constant.

16. helmikuuta 2021

My favorite techniques: twisted rib

 I’ve been a long time fan for twisted rib. I prefer it simply because it gives a nice and stretchy, yet a firm edge for knits. And in my opinion a twisted rib recovers best its original shape after stretching.

Twisted rib with K1tbl, P1tbl sts:


Twisted rib in a yarn with a tight spin might not feel as nice against your skin as in a yarn with a looser spin. To avoid this kind of uncomfortable detail I usually knit twisted rib for sock and sleeve cuffs, that comes tight against your sensitive skin, with a “twist”: on RS rep *K1tbl, P1* and on WS rep *K1, P1tbl*:


This way stitches on WS are a bit softer and smoother against the skin.

28. tammikuuta 2021

My favorite techniques: M1R and M1L

There is at least few ways of making one stitch when adding stitches in a knit (like knitting in the stitch below and knitting a stitch from front and back etc.), but my favorites are:

M1R (make one right)

Pick up yarn from behind between sts to left hand needle and K through front loop. This makes a right leaning stitch.

M1L (make one left)

Pick up yarn from front between sts to left hand needle and K through back loop. This makes a left leaning stitch.

I like the look of these techniques; how the stitches smoothly blend to the knitted surface and how they are easily spotted if you’re in need of counting the added stitches for example. These leaning stitches also gives you a chance to play with the structure of the stitches:

In this picture above I’ve worked “K until SM, M1L, sm, K to EOR” and in the picture below I’ve worked “K until SM, sm, M1L and K to EOR”.

My favorite is definitely the latter one. In my eyes it’s a teeny tiny bit of neater outcome.

24. tammikuuta 2021

My favorite techniques: Figure 8 CO

 I’ve been testing all kinds of knitting techniques during the years. And I love to test new ones in search of the perfect ones for me and my designs. Though I have already found some of my absolute favorites… that I will share with you in some upcoming blog posts.

The first technique I’m sharing with you is my favorite when casting on toe up socks:

Figure 8 Cast On


The CO is made with circular needles holding them parallel and wrapping the yarn in figure 8 around the needles. Leaving a short tail of the yarn wrap it around the upper needle and work the yarn alternately around and between the needles. Continue wrapping a figure 8 around the needles until you have the desired number of sts, ending with a bottom loop. You’ll now have an equal number of sts on both needles. The CO is ready only after working once the sts on the 2nd needle: rotate the needles so you’re holding them with your left hand and pull the bottom needle through the sts so that they’re on the cable. With the right hand needle K the first st of left hand needle and K the following sts tbl. Now the CO is ready.

18. toukokuuta 2020

Tubular Bind Off for 1 x 1 ribbing


My favorite BO has been for quite some time already Tubular BO. Definitely my “go to” when working with 1 x 1 ribbing. I favor it because it makes a firm, yet a really stretchy edge.

For making a Tubular BO I reserve a yarn tail that is at least 2.5 times the length of the stretched edge. Usually I reserve 3 times the length to be absolutely sure I have enough yarn for the BO.


Because the yarn tail is long and gets easily tangled, I thread it in double through the needle. Now the tail is a bit easier to manage.


I always start the Tubular BO on the RS of the work and with a K st. The first two sts are set-up sts before starting with the actual BO repeat: thread the darning needle through the first K st from back to front, bring then the needle between K and P sts from back to front and then thread the needle through the first P st from front to back.

Now the first two sts are ready for the Tubular BO repeat:
1. Thread the needle through first K st from front to back and sl st of the needle. Pass by P st and cont to thread the needle on RS through the second K st from back to front. Tighten the yarn.
2. Tread the needle through first P st from back to front and sl st from the needle. Pass by K st and cont to thread the needle from BS between K and P st to the front and then through the second P st from front to back. Tighten the yarn.


It takes a while to learn this BO, but I’ve gotten help from a simple “mantra”: thread K sts from front to back and again from back to front, and thread P sts from back to front and again from front to back.


To make a neat ending for in the round ribbing, BO the last two sts as follows: thread the needle through the last K st on the needle from front to back and sl st of the needle. Pass by the last P st and thread the needle on RS through the next K st (the first K st where the whole BO rnd started) from back to front. Thread the needle through the last P st on the needle from back to front and sl st from the needle. Pass by previous K st and thread needle through the next P st (the first P sts where the whole BO rnd started) from front to back.


Weave in end on WS of the work.

The ribbing edge is now really stretchy, yet firm and looks neat:

3. toukokuuta 2019

Rainbow socks for everyone!

I've gotten request about if it's okay to make Viisukat with other countries flags. Of course it is. Rainbow socks for everyone!

Now I've added a separate file of 23 flags of some other countries that are also participating Eurovision Song Contest 2019. In alphabetical order: Armenia, Austria, Belgium, Czech Republic, Denmark, Estonia, France, Georgia, Germany, Greece, Hungary, Iceland, Ireland, Italy, Latvia, Lithuania, Netherlands, Norway, Poland, Romania, Russia, Sweden and Switzerland.

Viisukat Extra Charts can be downloaded alongside with Viisukat from my Ravelry pattern store here!

I've made my Viisukat socks with Filcolana Arwetta Classic. The yarn is really durable and it has lasted out to over 3 pairs in adult sizes! For the 4th pair I finally had to start a couple of new skeins. For just one pair you'll need about 40 meters of the 5 contrasting colours, so not that much. So I managed to stretch out the yarns by changing main colour. So far I've always used a new rainbow colour as main colour.

If you're not interested in making a whole bunch of rainbow sock, but just one pair, you can by a Viisukat yarn kit from Ilo! The yarn kit is handdyed by Ullrike by Anki and contains just the amount to make one pair of Viisukat socks. The kit is so cute:


I would really appreciate if you would tag your Viisukat socks when publishing on social media with one of the following tags:
#Viisukat
#ViisukatKAL
#EurovisionSocks
#adelheiddesign

12. huhtikuuta 2019

Viisukat

In the beginning of February I stumbled on a short notice on Ilo Yarn stores Instagram account... Didn't think so much more of it except that the wish of merino wool was quite funny to me :D

But. My head works overtime even if I'd try to let things be... and suddenly my brain was full of ideas! Yes, I had a lot of ideas for the Eurovision socks! One idea got even to this stage:


Only to prove that my idea looked better in my head than as a knitted sock. Too much of everything: the old Eurovision logo, the new Eurovision logo, the Finnish flag (on the other side of the leg), rainbow flag, intarsia, stranded knitting, stripes and so on. I had to edit big time.

Obviously I had to keep the Finnish flag ;D And I really liked the rainbow colours, so that would also stay.

I knitted another pair with rainbow colour blocks and with the Finnish flag in a heart... and ripped it all! Because during the second sock my head was thinking of the rainbow stripes on my first proto knit and suddenly it hit me that would be the look I wanted.


Oops! There was a deadline! No big deal if it wouldn't have been the busiest time at work! Luckily I work pretty good under pressure and I met the deadline not only by knitting two pairs of men's size socks but also by writing down the pattern. Whooh!

So there's also the reason why the pattern has only a quick shot of the socks.

Pattern for Viisukat is available in my Ravelry store! For free ;)

23. syyskuuta 2017

Testing?

I've had a plan for a really personal pattern for quite on time and the process to make one and further to turn it to a pattern has been long...  I just checked my bookkeeping and I casted my first Hjördis on the needles pretty much one year ago.  It was finished in December and the original cardigan in Tukuwool fingering looks like this:


I casted on the second version even before finishing the first one, 'cause I wanted to try it in two colours. Not a good idea! So not my thing and required a lot of concentration 'cause I wanted it also to bee seamless and that meant two coloured brioche with sort rows as well as intarsia edges. This version was not the relaxing almost brainless knitting that I was in mood for. So it took quite a while to get it finished and I got it done only 'cause I had a deadline: it had to be done before flying abroad to visit a friend to whom I made it as a present! The cardigan is made in some kind of wool blend (forest green) and a mohair blend (dirty peach) I'm though very pleased with the finished cardigan:


This summer I got a vision of a longer version that I just had to cast on right away! And I'm in love with my bright mohair blend cardigan:


Do you want to test the pattern?

Sizes: XS - S - M - L - XL - XXL - 3XL to fit bust Circ 70 - 80 - 90 - 100 - 110 - 120 - 130 cm (28 - 32 - 36 - 40 - 44 - 48 - 52”)
Gauge: 10 x 10 cm (4”) = 20 sts and 40 rows in Brioche (in Brioche 1 st cowers 2 rows)
Yarn weight: fingering

Deadline: December 2nd, 2017


More in my Ravelry groups test thread.

27. maaliskuuta 2016

Raanu

Year 2015 was anniversary for folk costumes in Finland and even I got very inspired. I didn't use though directly folk costumes as inspiration sources but got inspired by other traditional textile crafts. As one source for my inspiration was a traditional wall hanging raanu that I used for a stranded pattern and executed as a cardigan:


SIZES: XS - S - M - L - XL - XXL - 3XL
FINISHED MEASUREMENTS: 
Bust Circ 100 - 110 - 120 - 130 - 140 - 150 - 160 cm (40 - 44 - 48 - 52 - 56 - 60 - 64”)
YARN WEIGHT: fingering (14-16 wpi)
RECOMMENDED YARN: RintalanTila Kampalanka 
MATERIALS: 
MC about 720 - 815 - 920 - 1040 - 1175 - 1330 - 1500 m (790 - 895 - 1010 - 1140 - 1285 - 1455 - 1640 yd) and CC1, CC2 and CC3 each about 180 - 205 - 230 - 260 - 295 - 335 - 380 m (197 - 225 - 252 - 285 - 323 - 367 - 415 yd)
NEEDLES: 3 and 3.5 mm (US 2.5 and 4) or a size to obtain gauge
GAUGE: 10 x 10 cm = 24 sts and 34 rows
SKILL LEVEL: advanced
TECHNIQUES:
Provisional crochet CO, short rows, stranded knitting in flat, chart, intarsia
PRICE: 6€ 


30. marraskuuta 2015

Top Down Hulda Jacket

I have re-written the pattern for Hulda Jacket! The new pattern, Top Down Hulda Jacket, is now a top down version of the original jacket, made in one piece without any seams and also with more sizes and multiple gauge alternatives!


FINISHED MEASUREMENTS:

YARN WEIGHT, NEEDLES, GAUGE and MATERIALS: in table below - The jacket is worked with same size needles throughout the whole work. Use needle size in the table or a size to obtain the gauge. Pattern is written for 4 different yarn weights and gauges that are listed on the table.


SKILL LEVEL: intermediate
TECHNIQUES: short rows, stitch count charts, Provisional Crochet CO
EXAMPLE PIECE: The original Hulda jacket is made of unknown fingering weight wool blend in size S. The new top down version in size M that is made in quadruple cobweb weight mohair blend that is equivalent to a sport weight yarn. Both jackets are photographed on a 170 cm (5’7”) tall model with strategic measurements of 80 – 70 – 95 cm (31.5 – 27.5 – 37.5”).
PRICE: 5 € 

Tein Huldan takin ohjeen uusiksi… Top Down Hulda Jacket neulotaan ylhäältä alas täysin saumattomasti! Uudelleen kirjoitetussa ohjeessa on nyt myös lisää kokoja sekä useampi tiheysvaihtoehto eri vahvuisille langoille.


VALMIIN NEULEEN MITAT: yllä olevassa tasokuvassa
LANKA, PUIKOT, TIHEYS JA LANGAN KULUTUS: yllä olevassa taulukossa - Koko työ neulotaan samankokoisilla puikoilla. Ohje on kirjoitettu neljälle eri vahvuiselle langalle ja tiheydelle, jotka löytyvät taulukosta.
VAIKEUSLUOKITUS: keskiverto
ERIKOISTEKNIIKAT: Lyhennetyt kerrokset, silmukkaluvut taulukoissa ja väliaikainen virkkausaloitus.
ESIMERKKINEULE: Alkuperäisen Huldan takin lankana tuntematon villasekoite ja se on neulottu koossa S.  Uusi ylhäältä alas neulottu versio on nelinkertaisesta hiuksenhienosta mohairsekoitteesta koossa M. Molemmat takit on kuvattu 170 cm pitkän mallin päällä, jonka strategiset mitat ovat 80 – 70 – 95 cm.
HINTA: 5 € 


9. marraskuuta 2015

Still Panda

I’ve had a long time plan to make myself Still Light Tunic by Veera Välimäki. It was on my to do -list for a really, really long time, for years and I even got the pattern in the beginning of the year as a Mummot lumessa birthday raffle gift… Now I finally took the time to make it!

I did some modifications to the pattern and they are listed in my project page onRavelry, as well as modifications that I need to do to the next one. The biggest modification though was to mash-up the pattern with my own Panda pattern:


I’m really pleased with my new tunic! 

7. lokakuuta 2015

Test knitters wanted again: Eufrosyyne jacket


Sizes: S – M – L – XL – XXL – 3XL to fit bust Circ 80 – 90 – 100 – 110 – 120 – 130 cm (32 – 36 – 40 – 44 – 48 – 52”)
Gauge: 10 x 10 cm (4”) = 20 sts and 26 rows
Yarn weight: sport/DK
Deadline: February 14th, 2016
More in my groups test thread.
Eufrosyyne is worked top down without any seams. The garter stitch collar continues as a frame through the whole hem and with optional fringes.

So this jacket that is named after my ancestor and is inspired by Finnish folklore. The stranded knitted stripe on the hem is a modification of traditional Finnish embroidery called “red embroidery”. (Here is one example of traditional red embroidery.)

This project has been a whole lot of work… I got the idea about a year ago and started to work with the first version of the jacket in the beginning of this year. The first one looked like this:


I wasn’t happy with it at all. The yarn wasn’t smooth enough… and the construction didn’t work in reality as I had imagined in my mind; there’s too much fabric in the front. I didn’t even like the first version of my stranded pattern. So I did some new calculations, modified the stranded pattern and started all over.

This time I also graded the pattern ahead and made the next version for a dear friend. I was really happy with the look on this one:


And of course I wanted my own version of the jacket! I ordered some really nice yarn and started to work with my own piece… only to once again notice that my yarn wasn’t suitable. This time it was way too thin. – The yarn has been used though to something else that I’m going to reveal shortly ;)

So I re-wrote the pattern once more, now for a whole new yarn weight. And this time my Eufrosyyne is spot on!


If you would like to test knit the pattern, follow this link to my Ravelry group where you’ll find more details about the pattern and a link further to a page where I’ve gathered some basic information about how I run my tests :)

Edit 13.10.2015: Ohjeen raakile käännetty nyt myös suomeksi!

13. syyskuuta 2015

Ruusa Girl Cardigan

Pienempi versio Ruusa neuletakista. Malli on edelleen vyötärömittainen neuletakki kirjoneulekaarrokkeella, jossa ruusut puhkeavat hiljalleen kukkaan. Työ neulotaan ylhäältä alas täysin saumattomasti, jolloin sovittaminen työn edetessä on helpompaa ja samalla voi säätää hihojen ja helman pituutta. Esim. todella hoikalle lapselle voi valita koon vartalon ympäryksen mukaan, mutta neuloa vartalon ja hihat pituuden mukaan.

Kirjoneule toteutetaan pääasiassa tasoneuleena ja pääntie muotoillaan lyhennetyin kerroksin samaan aikaan kirjoneuleen kanssa. Paikoitellen kirjoneuleessa käytetään samaan aikaa kolmea eri väriä. – Myös Ruusa tytön neuletakki ohje sisältää vinkkejä miten toteuttaa kirjoneule siististi.

KOKO: 100 – 110 – 120 – 130 – 140 – 150 cm
VALMIIN TYÖN MITAT: vartalon ympärys 63 – 67 – 70 – 75 – 78 – 82 cm
LANKA: TukuwoolFingering tai vastaava fingering vahvuinen lanka, jonka juoksevuus on n. 400 m/100 g (wpi 14)
LANGAN KULUTUS:
 pääväriä n. 330 – 430 – 550 – 710 – 925 – 1200 m, 1. kuvioväriä n. 110 – 120 – 130 – 140 – 150 – 160 m ja 2. kuvioväriä n. 35 – 40 – 45 – 50 – 60 – 70 m
PUIKOT: 2,5 ja 3 mm pyöröpuikot, tai käsialan mukaan
TIHEYS: 10 x 10 cm = 24 s ja 34 krs
VAIKEUSLUOKITUS: edistynyt
TEKNIIKAT: lyhennetyt kerrokset, kirjoneule tasona, kaavio, intarsia, väliaikainen virkkausaloitus


HINTA: 6€ 


This is a smaller version of Ruusa Cardigan. Still a cropped cardigan with a circular yoke where the roses start to blossom. Cardigan is worked top down without any seams that enable trying the work on along the way and adjusting sleeve and hem length. E.g. for a really slim child you can choose the size according to bust circumference and do the sleeve and body length according to height.

Rose and leaf motif that is works mainly flat includes using three different colours at the same time and the neckline is shaped with short rows while working the motif. – This pattern includes also tips on how to keep the stranded part neat.

SIZES: 100 – 110 – 120 – 130 – 140 – 150 cm (40 – 44 – 48 – 52 – 56 – 60”) – height of the child
FINISHED MEASUREMENTS: 
bust 63 – 67 – 70 – 75 – 78 – 82 cm (25 – 27 – 28 – 30 – 31 – 33”)
YARN WEIGHT: fingering (14 wpi)
RECOMMENDED YARN: Tukuwool Fingering
MATERIALS: 
MC about 330 – 430 – 550 – 710 – 925 – 1200 m (360 – 470 – 600 – 780 – 1010 – 1315 yd), 
CC1 about 110 – 120 – 130 – 140 – 150 – 160 m (120 – 130 – 145 – 165 – 185 – 210 yd) and CC2 about 35 – 40 – 45 – 50 – 60 – 70 m (40 – 45 – 50 – 55 – 65 – 80 yd)
NEEDLES: 2.5 and 3 mm (US 1.5 and 2.5) or a size to obtain gauge
GAUGE: 10 x 10 cm = 24 sts and 34 rows
SKILL LEVEL: advanced
TECHNIQUES: short rows, stranded knitting flat, chart, intarsia, Provisional Crochet CO


PRICE: 6€ 

25. elokuuta 2015

Tubulaaria

Neuloin tuossa alkukesästä Byzantium topin testineuleena Irina Anikeevalle ja opin samalla jotain mulle uutta: Tubular Bind Offin. Ihastuin tekniikkaan ja opettelin saman tien myös Long Tail Tubular Cast Onin (Mulla ei siis ole mitään tietoa tekniikoiden mahdollisista suomenkielisistä nimistä, saa vinkata!), joka ei antanutkaan ihan samanlaista lopputulosta… Ero ei ole iso, mutta päättelynä reunasta tulee hieman napakampi / In the beginning of summer I test knitted Byzantium top for Irina Anikeeva and learned something new: Tubular Bind Off. I fell in love with the new technique and learned right away also Long Tail Tubular Cast On that didn’t give quite the same result… The difference isn’t big, but with bind off the edge is a bit snugger:


Kuvassa on nyt kaksi eri kokoista pipoa päällekkäin eli ero ei ihan noin suuri ole :D Päällimmäisessä reuna vetää kuitenkin hieman enemmän sisäänpäin. Sormilla hipeltäessä eron huomaa kuitenkin heti.

Opeteltuani nämä uudet tekniikat, en varmaan vähään aikaan muita käytäkään 1 o, 1 n -joustinneuleessa!

There’s two different size beanies in the picture so the diverse isn’t quite that big :D The edge off beanie on the top pulls a bit inward. With your fingers though you can feel the difference immediately.

After learning these new techniques I won’t be using for a while any others for 1x1 rib!

Ai niin, kuva vielä Byzantiumista / and a picture of Byzantium top:


14. elokuuta 2015

Twirly


Twirly was inspired by InayaCreations gradient yarns and was a small and fast project I did in just a few days. I was so desperate need of getting something finished from my needles between all of my time consuming big cardigan projects. This beanies trick is the twirl that is formed with lifted stitches that goes around the whole beanie. The twirl makes knitting in otherwise a basic beanie a bit more interesting.


I’ve made my example pieces in colours Grayscale and Grapes of Wrath. In the Grayscale version I’ve started the main colour from the dark end of the skein and the contrasting from the light end of the skein. And in the Grapes of Wrath I’ve started the main colour from the pink end of the skein and the contrasting colour from the gray end of the skein.


SIZES: XXS – XS – S – M – L – XL
FINISHED MEASUREMENTS: head circumference 42/48 – 46/50 – 50/54 – 54/58 – 58/62 – 62/66 cm (16.5/19 – 18/20 – 20/21.5 – 21.5/23 – 23/24.5 – 24.5/26”)
YARN: Inaya Evolution Sport Sock (260g/100m) or similar sport weight (12 wpi) gradient yarn
NEEDLES: 2.5 and 3 mm (US 1.5 and 2.5) or a size to obtain gauge
GAUGE: 10 x 10 cm = 24 sts and 32 rows
SKILL LEVEL: intermediate
TECHNIQUES: Provisional CO/Tubular BO or Tubular Long Tail CO, slipped sts
MATERIALS: MC about 71 – 78 – 86 – 95 – 105 – 116 m (78 – 85 – 94 – 104 – 115 – 127 yd) and CC about 40 – 43 – 47 – 52 – 58 – 64 m (44 – 47 – 52 – 56 – 64 – 70 yd)

PRICE: 3€

1. elokuuta 2015

Ruusa Cardigan

Ruusan alkuvaiheista tein jo postauksen tuossa keväällä ja se lopullinen versiokin valmistui loppukeväästä:


Ohjetta raapustaessa ja laskelmia tarkistaessa päädyin myös neulomaan yhden version suurimmassa koossa, kun piti varmistaa että mun laskelmat varmasti pitivät paikkansa myös käytännössä – tästä versiosta ei vielä ole kovin edustavaa kuvaa, vain liian iso takki pienen torson päällä Ravelryn projektisivulla.

Seuraavaksi oli vuorossa testineulonta, jonka palautteiden perusteella vielä hienosäädin ohjetta. Viimeiset kuvaukset tänä aamuna ja nyt vihdoin pääsen julkaisemaan Ruusa neuletakin ohjeen, olkaa hyvä:


Ruusa on lyhyt, vyötärömittainen neuletakki kirjoneulekaarrokkeella, jossa ruusut puhkeavat hiljalleen kukkaan. Työ neulotaan ylhäältä alas täysin saumattomasti ja ohje sisältää vaihtoehdot rinnan ja vyötärön muotoiluille.

Kirjoneule toteutetaan pääasiassa tasoneuleena ja pääntie muotoillaan lyhennetyin kerroksin samaan aikaan kirjoneuleen kanssa. Paikoitellen kirjoneuleessa käytetään samaan aikaa kolmea eri väriä.

Ohje sisältää vinkkejä miten toteuttaa kirjoneule siististi.

KOKO: XS – S – M – L – XL – XXL
VALMIIN TYÖN MITAT: vartalon ympärys 70 – 80 – 90 – 100 – 110 – 120 cm
LANKA: Tukuwool Fingering tai vastaava fingering vahvuinen lanka, jonka juoksevuus on n. 400 m/100 g (wpi 14-16)
LANGAN KULUTUS: pääväriä n. 620 – 700 – 800 – 910 – 1030 – 1170 m, 1. kuvioväriä (kukat) n. 140 – 140 – 170 – 170 – 205 – 205 m ja 2. kuvioväriä (lehdet) n. 70 – 70 – 85 – 85 – 105 – 105 m
PUIKOT: 2,5 ja 3 mm pyöröpuikot, tai käsialan mukaan
TIHEYS: 10 x 10 cm = 24 s ja 34 krs
VAIKEUSLUOKITUS: edistynyt
TEKNIIKAT: lyhennetyt kerrokset, kirjoneule tasona, kaavio
, väliaikainen aloitus

HINTA: 6€

I made a post about Ruusa Cardigan in the beginning of the project and even the final version of the cardigan finished already in spring.

Now after feedbacks from my testers and fine-tuning the pattern I’m ready to publish it:


Ruusa is a cropped cardigan with a circular yoke where the roses start to blossom. A rosy stripe adorns also the hem and cuffs. The cardigan is inspired by traditional rose cross stitch motifs on table cloths.


Cardigan is worked top down without any seams and the stranded motif is mainly worked flat. Rose and leaf motif includes using three different colours at the same time and the neckline is shaped with short rows while working the motif.

Pattern includes tips on how to keep the stranded part neat.

SIZES: XS – S – M – L – XL - XXL
FINISHED MEASUREMENTS: bust 70 – 80 – 90 – 100 – 110 – 120 cm (28 – 32 – 36 – 40 – 44 – 48”)
YARN WEIGHT: fingering (14-16 wpi)
RECOMMENDED YARN: Tukuwool Fingering
MATERIALS: 
MC about 620 – 700 – 800 – 910 – 1030 – 1170 m (680 – 765 – 875 – 995 – 1130 – 1280 yd), CC1 about 140 – 140 – 170 – 170 – 205 – 205 m (155 – 155 – 190 – 190 – 225 – 225 yd) and CC2 about 70 – 70 – 85 – 85 – 105 – 105 m (80 – 80 – 95 – 95 – 115 – 115 yd)
NEEDLES: 2.5 and 3 mm (US 1.5 and 2.5) or a size to obtain gauge
GAUGE: 10 x 10 cm (4") = 24 sts and 34 rows
SKILL LEVEL: advanced
TECHNIQUES: short rows, stranded knitting flat, chart
, provisional cast on

PRICE: 6€